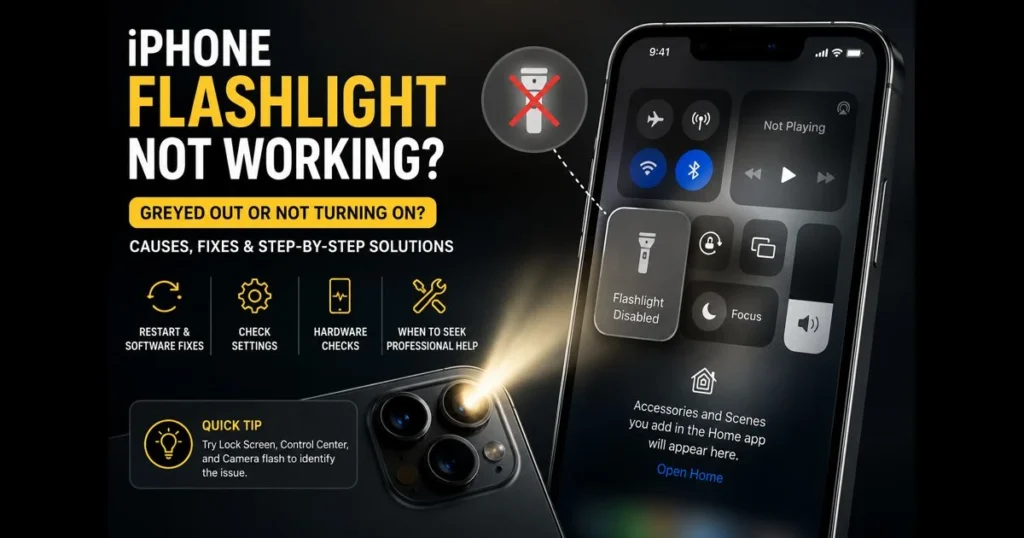
Typing “iPhone flashlight not working” in a dark room while fumbling for the switch can be frustrating. The flashlight is one of the iPhone’s simplest tools, yet when the icon is greyed out or the light won’t turn on, it becomes a big deal. This guide explains common reasons for flashlight failure, troubleshooting steps, and practical fixes that often bring it back to life. We’ll cover quick software fixes, settings resets, hardware checks, and when to seek professional help. For diagnostics, you can use our optional Torch Tester—a third‑party, self‑guided checklist (not an Apple tool and it cannot control your iPhone’s LED)—to help confirm symptoms before booking a repair. Whether your iPhone camera flashlight is inconsistent, the Control Center tile shows “flashlight disabled,” or your flashlight is completely unresponsive, follow the checklist below. A few minutes of troubleshooting can save you a trip to the store.
- Understanding the iPhone Flashlight Feature
- Common Reasons for Flashlight Issues
- How to Troubleshoot a Greyed Out Flashlight
- Checking for App Conflicts
- Resetting Your iPhone Settings
- Hardware Checks for Flashlight Issues
- When to Seek Professional Help
- Preventive Measures for Future Issues
1. Understanding the iPhone Flashlight Feature
The iPhone’s flashlight utilizes the same rear LED module as the camera flash. iOS provides quick access controls on the Lock Screen and in Control Center, allowing you to adjust intensity with a press-and-hold on the Flashlight tile. Since the torch shares hardware with the camera, any issues with the camera flash can also affect the flashlight. Related reading: flashlight test online.
For everyday access, two places matter. In Control Center (swipe down from the top-right on Face ID models), you can add or reorder the Flashlight tile in Settings > Control Center—this is handy for creating shortcuts. On the Lock Screen, the flashlight button is designed for no-look activation, which often leads to accidental triggers in pockets. Related reading: flashlight not working android.
It’s important to note that the iPhone camera flashlight and the still-photo flash behave differently. The torch provides continuous light, while the camera flash is a quick burst. This distinction can cause overheating, app conflicts, or camera modes to grey out one or both functionalities. (See: CNET.)
2. Common Reasons for Flashlight Issues
Software glitches and bugs
Temporary iOS hiccups can leave the torch icon unresponsive or missing after an update. Control Center occasionally desyncs from system services, leading to a greyed-out icon despite a functioning LED. A troublesome Camera app, corrupted settings, or aggressive Focus settings can also produce flashlight issues that seem hardware-related.
Hardware malfunctions or damage
Drops or liquid exposure can damage the LED solder joints or camera module flex cable. A cracked lens cover, debris around the flash window, or a case partially blocking the LED can make the light appear weak or inconsistent. If the LED module fails, you’ll often find the flashlight unresponsive in both Control Center and Camera app flash options.
Battery settings impacting flashlight usage
If your iPhone is very warm or running low on power, iOS may limit power-hungry functions. You might notice a message indicating that the flash is disabled until the device cools down. Low Power Mode typically doesn’t block the flashlight, but thermal limits and protection rules can. Charging in a hot environment or using intensive applications simultaneously can trigger these restrictions.
3. How to Troubleshoot a Greyed Out Flashlight
Restarting your iPhone
A simple restart can clear stuck services that reserve the LED. Power off your device completely, wait 20 seconds, and then power it back on. If you can’t access menus, try a force restart (the method varies by model, but usually involves pressing Volume Up, Volume Down, and then holding the Side button). After rebooting, first test the torch from the Lock Screen, then from Control Center.
Two quick checks often help: close the Camera app before testing, and remove any third-party camera app from the App Switcher. If the torch works after this, you’ve identified a software lock.
Checking for software updates
On recent iOS versions, go to Settings > General > Software Update and install any available updates; you can also enable Automatic Updates there. Menu names may vary slightly across iOS releases, so always check the Software Update screen regularly for the latest fixes, then test again. While you’re at it, go to Settings > Control Center, remove the Flashlight tile, restart, and then re-add it. This refresh can resolve lingering greyed-out states without deeper resets.
Resetting settings to default
If the icon remains greyed out, a settings reset can address corrupted toggles effectively. Go to Settings > General > Transfer or Reset iPhone > Reset > Reset All Settings. This won’t erase your photos or apps but will revert Wi-Fi, Bluetooth, privacy, and layout preferences. We’ll detail the implications in Section 5 to help you make an informed decision.
4. Checking for App Conflicts
Identifying apps that may interfere with the flashlight
Any app that accesses the camera can reserve the LED, including QR scanners, video recorders, and live-streaming tools. Check which apps can use the camera in Settings > Privacy & Security > Camera. There isn’t a separate camera permission for flash in iOS, so if an app has camera access, it can potentially keep the LED busy.
Another potential issue is the Camera app itself. If the flash is set to On or Auto for video, or if you’ve switched to modes that control exposure, the OS may keep the module engaged. Close the Camera app completely and try the torch again. Shortcuts that toggle the torch on a schedule can also interfere; check for any automations in Shortcuts > Automation.
Disabling third-party apps that use the flashlight
Follow this sequence:
- Force quit all camera-related apps from the App Switcher.
- Temporarily disable Background App Refresh for camera/scanner apps in Settings > General.
- Toggle Camera access off for suspect apps (Settings > Privacy & Security > Camera) and test.
- Uninstall any recently added camera or flashlight utilities, then restart.
If the torch works only after disabling a specific app, you’ve identified the conflict. Keep that app off until the developer issues a fix, or report the bug through the App Store listing.
5. Resetting Your iPhone Settings
Steps to reset all settings on your iPhone
When a restart and app checks don’t resolve the issue, a full settings reset can clear deep configuration problems without erasing your content.
- Back up first. Use iCloud Backup or a computer to ensure you can restore Wi-Fi passwords and preferences later.
- Open Settings > General > Transfer or Reset iPhone.
- Tap Reset > Reset All Settings, enter your passcode, and confirm.
- After reboot, reconnect to Wi-Fi, re-pair Bluetooth accessories, and retest the flashlight from both the Lock Screen and Control Center.
This reset preserves apps, messages, and media while targeting system-level toggles that may leave your flashlight unresponsive even when hardware is fine.
Understanding the impact of resetting settings
You’ll lose saved Wi-Fi networks and passwords, VPN and APN settings, Bluetooth pairings, and keyboard dictionaries. Your Apple ID and content will remain intact. If the torch returns after the reset, gradually re-enable camera permissions and automations to identify the specific setting that triggered the issue.
6. Hardware Checks for Flashlight Issues
Inspecting for physical damage to the device
Examine the flash window near the camera lenses. Dust, lint, or a film can mute the light. Remove your case and clean the area gently with a microfiber cloth. Avoid sharp tools around the lens—scratches can diffuse light permanently.
If your device has been dropped or exposed to liquid, the LED module or camera assembly may be damaged. Intermittent light, buzzing near the camera, or flickering when pressing around the camera bump are signs of a hardware fault.
Testing the camera and other functions linked to flashlight
Open the Camera app, switch to Photo mode, and set the flash to On (not Auto). Take a picture in a dim room. If the flash activates strongly but Control Center shows a greyed-out icon, the issue is likely software. If the flash doesn’t activate at all, you may be facing a hardware problem.
Use our optional Torch Tester for a guided, manual flashlight check. It’s a third‑party helper—not an Apple or industry-standard diagnostic—and iOS won’t let websites control the rear LED directly, so it simply walks you through checks and helps document results for support. If you’re looking for “flashlight not working” solutions for Android, please refer to our Android-specific guide instead.
One more check: record a short video with the flash toggled on in the Camera app. If the flashlight remains steady for 10–15 seconds without dimming, the LED has likely passed a basic stress test. Sudden dimming or shutdowns, especially with a temperature warning, suggest thermal limits or a failing battery.
7. When to Seek Professional Help
Determining if the problem is beyond DIY fixes
If restarting, updating iOS, resetting settings, and ruling out conflicting apps don’t resolve the issue—especially if the torch only works sporadically—professional diagnostics are warranted. Persistent greyed-out icons after a clean settings reset, visible physical damage, or tripped water indicators all justify seeking service. If the camera flash works but the torch does not, this can indicate a logic-level fault rather than an LED failure.
How to find an authorized service center
Use the Apple Support app or visit getsupport.apple.com to schedule a Genius Bar appointment or find an Apple Authorized Service Provider. Back up your iPhone and note your Apple ID password before your appointment. If a repair is recommended, ask for a written summary of the test results; this helps if issues recur. An Authorized Service Provider can run diagnostics to differentiate between a camera module failure and a board-level issue.
8. Preventive Measures for Future Issues
Regular software updates and maintenance tips
Keep iOS updated to benefit from fixes that improve system services like Control Center. Regularly rebooting your device can clear minor conflicts. If you utilize automation, avoid stacking multiple torch-related Shortcuts that might interfere, and review them after major updates. Occasionally remove and re-add the Flashlight tile in Settings > Control Center to refresh access.
Best practices for using the flashlight feature
- Avoid using the torch at maximum brightness for extended periods in hot environments, as heat can shorten component life.
- Remove the phone from thick cases while charging if the back gets warm; less heat helps avoid thermal shutdowns.
- Gently clean the flash window—smudges can scatter light and mimic a weak LED.
- Manage app permissions carefully. Apps with camera access can monopolize the LED; revoke access for untrusted tools.
- Consider automation that turns off the torch after a set time to prevent accidental battery drain.
If you want extra features like widgets, strobe, or SOS, consider well-rated flashlight apps from the App Store that complement the built-in torch (for example, Super‑Bright LED Flashlight or Flashlight Ⓞ by reputable developers). On other platforms, popular options include Flashlight LED Widget and Tiny Flashlight + LED.
Remember the basics: if the torch fails suddenly, start by trying the Lock Screen button, then Control Center, and finally the Camera with flash On. This sequence quickly clarifies whether it’s an access issue, a software toggle, or a more serious fault that needs escalation.
Your iPhone flashlight may seem simple, but the chain of hardware, thermal rules, permissions, and apps can be complex. Work through the steps methodically, and if helpful, use our optional, self-guided Torch Tester to document symptoms—you’ll either resolve the issue or arrive for service equipped with detailed information. If you still see the flashlight greyed out, initiate a support ticket now and include your test notes—getting help is faster when you’ve narrowed down the cause.
Frequently Asked Questions
Why is my iPhone flashlight not working?
There could be several reasons for your iPhone flashlight not working, including a software glitch, low battery, or hardware issues. Start by restarting your device and checking for any software updates.
How can I fix my iPhone flashlight if it’s not responding?
Try toggling the flashlight off and on in the Control Center. If that doesn’t work, reset your device settings by going to Settings > General > Reset > Reset All Settings, but be aware this will erase saved Wi-Fi passwords and other personalized settings.
Is there a way to check if my iPhone flashlight hardware is damaged?
You can check if the flashlight hardware is damaged by testing the camera’s flash feature. If the camera flash works but the flashlight doesn’t, it may be a software issue. If neither works, consider visiting an Apple Store for a hardware inspection.