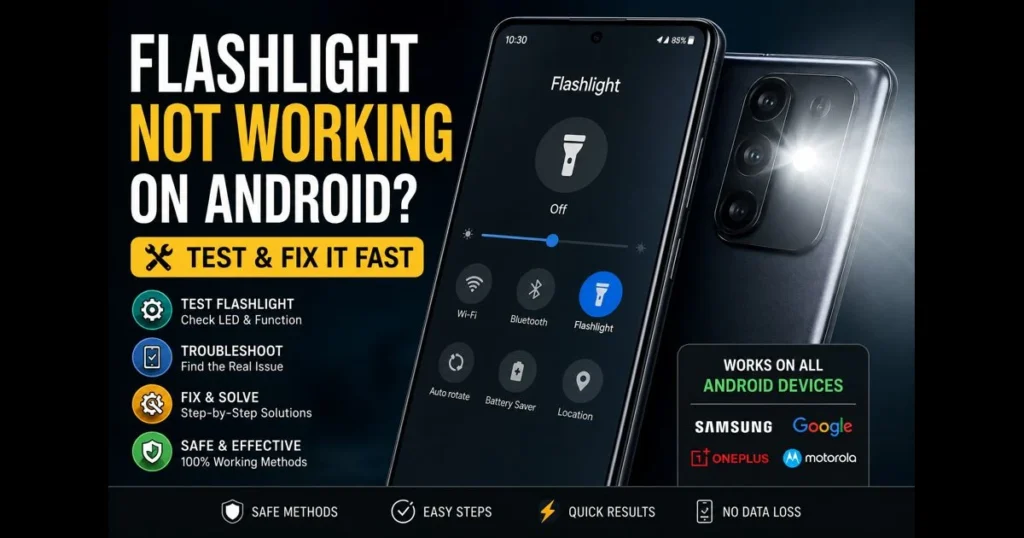
If your flashlight isn’t working on Android, there’s no need to fumble in the dark. Your phone’s torch depends on both software controls and the camera’s LED hardware. A glitch in either can prevent the light from turning on, cause flickering, or lead to it shutting off immediately. This guide walks you through quick checks, deeper diagnostics, and safe fixes that work across brands like Google, Samsung, OnePlus, and Motorola. We’ll also point you to handy tools—like our site’s built-in torch tester—to determine what’s broken. Whether the flashlight won’t turn on from Quick Settings or you’re seeing odd blinking while recording video, these steps will help you identify the issue and restore reliable light quickly.
Keep a soft cloth nearby. Many “Android torch not working” complaints stem from a smudged or blocked lens window. Others can be traced to an app that has claimed the camera or a power-saving mode that throttles the LED. We’ll cover all these possibilities. (See: Android Operating System.)
- Understanding the Android Flashlight Feature
- Initial Troubleshooting Steps
- Identifying Software Issues
- Checking Hardware Problems
- Using Safe Mode for Troubleshooting
- Resetting App Preferences
- Factory Reset as a Last Resort
- Alternative Solutions and Apps
- Preventive Measures for Future Issues
1. Understanding the Android Flashlight Feature
On Android, the flashlight operates using the camera’s LED in “torch” mode. The Quick Settings tile or a voice command activates a system service, which prompts the camera to keep the LED on continuously. Since the torch relies on the camera stack, anything that occupies the camera—like a barcode scanner or social app—can interfere with the light.
This also explains why some camera flash issues mimic flashlight problems. If your camera can’t access the LED—perhaps due to high heat or critically low battery—the torch may fail or dim as a protective measure.
Common uses include lighting a hallway, finding a dropped earring, or scanning a shipping label in a dim room. Less obvious uses can be as a video fill light or an on-the-go camping lantern, but avoid prolonged exposure to eyes and skin for safety.
2. Initial Troubleshooting Steps
Check if the flashlight toggle is enabled in the Quick Settings menu.
Start with the basics. Swipe down twice from the top to open Quick Settings and tap the Flashlight tile. If it’s missing, tap the pencil or “Edit” icon, then drag the Flashlight tile into your active set. This is also where many phone manufacturers house flashlight settings, like tile order or lock screen access.
If the tile won’t turn on or turns off immediately, try these quick checks:
- Close the Camera app, then try again. The app may be holding the LED.
- Disable Battery Saver and any extreme power modes that limit hardware.
- Remove any thick or opaque case that might cover the flash window.
- Wait a minute if your device is hot; thermal protection can prevent torch use.
If you’re still troubleshooting the flashlight, keep going—one of the following steps usually resolves persistent issues.
Restart your device to see if that resolves the issue.
A power cycle often clears jammed services. Hold the Power button and select Restart (or Power off, wait 30 seconds, then power on). It’s a simple step that frequently releases the camera service from a stale state.
You can also force-stop the Camera app: Settings > Apps > Camera > Force stop. Then try the torch tile again. A minute of patience here can save an hour of searching for solutions.
3. Identifying Software Issues
Ensure your Android operating system is up to date.
Outdated system components can disrupt camera APIs or the Quick Settings tile. Open Settings and navigate to System > System update or Settings > Software update, depending on your device. Install any available updates, then restart. If your phone recently received a major OS upgrade, check the manufacturer’s support notes for camera or torch fixes and known issues; some temporary glitches can occur right after updates.
After updating, test the torch from Quick Settings and the Camera app’s flash controls to compare behavior.
Look for any recent app installations that might interfere with flashlight functionality.
Conflicts often arise from apps that request camera access: QR/barcode scanners, social media, video chat, document scanners, or third-party camera apps. If your issues began after installing one of these, uninstall it and test again.
Not ready to uninstall? Open Settings > Apps > [App] > Permissions and deny Camera access. This indirectly prevents camera permission for flash too, which can free the LED for the system torch. If the light returns, you’ve identified the culprit. Keep notes as you test to avoid going in circles.
4. Checking Hardware Problems
Inspect your device for physical damage that might affect the flashlight.
Shine another light at your phone’s flash window. Look for lint under a case, a cracked lens cover, or residue from a sticker. Clean it with a microfiber cloth and a small puff of air; avoid liquids that could seep in.
Watch for flashlight blinking when holding the torch still. Random pulsing or dimming can indicate a loose LED module, moisture exposure, or thermal throttling. If drops or water exposure are part of the story, hardware service may be necessary.
Test the camera flash to determine if the hardware is functioning.
Open the Camera app, set Flash to On (not Auto), and take a photo. The LED should burst brightly. Then switch to Video and look for a “Torch” or “Flashlight” icon to keep the light on during recording; this mimics system torch mode. If the LED works here but not from the Quick Settings tile, software issues are likely to blame.
You can also run a repeating on/off pattern with our site’s built-in torch tester—think of it as a quick flashlight test online—so you can check if the LED maintains a steady beam without dimming or cutting out. If the light fails during this browser-controlled test, you may face a hardware limitation or heat issue.
5. Using Safe Mode for Troubleshooting
Learn how to boot your device in Safe Mode.
Safe Mode loads only core apps and services. On many phones, press and hold the Power button until the power menu appears, then press and hold “Power off” until a Safe Mode prompt shows. Confirm this action. Your phone will reboot with third-party apps disabled and display a “Safe mode” watermark on the screen.
If this method doesn’t work on your model, try holding Power and Volume Down together from the power menu, or search your manufacturer’s support page for the correct steps. The goal is to start fresh with only system software.
Determine if third-party apps are causing conflicts with the flashlight feature.
In Safe Mode, try the Flashlight tile and the Camera app’s torch. If the light works normally, you’ve encountered an app conflict. Common suspects include:
- QR and barcode scanners that keep the camera session alive in the background.
- Third-party camera or video apps with persistent overlays.
- LED notification or call recording apps that adjust hardware behavior.
- Automation tools that toggle the torch based on gestures.
Reboot normally, then remove or disable these suspects one by one, testing after each change. Focus on camera-related apps first to streamline the process.
6. Resetting App Preferences
Guide on how to reset app preferences on Android.
If permissions or disabled system apps are tangled, a reset can help. Go to Settings > Apps > See all apps, tap the three-dot menu, and choose Reset app preferences. Confirm.
This does not erase personal data. It restores defaults for:
- Disabled apps and app notifications
- Default apps for actions (camera, dialer, SMS, etc.)
- Background data restrictions
- Permission restrictions for apps
Afterward, reopen the Camera app once, grant requested permissions, and try the torch again.
Discuss the potential impact of resetting app preferences on flashlight functionality.
Since torch control relies on camera and system UI components, restoring defaults can revive a disabled or restricted part of the chain. If you had previously denied Camera access to an app that needs it, you’ll be prompted again. Be cautious: granting too many apps camera permission can recreate conflicts. A balanced approach—granting only to trusted apps—keeps the system torch free. If a specific app requires camera permission for flash features, like a pro camera tool, you’ll need to re-approve it intentionally.
7. Factory Reset as a Last Resort
When to consider a factory reset if the flashlight is still not working.
If torch failures persist in Safe Mode, across system tiles, and after updates and app preference resets, deep software corruption or a hardware fault may be present. A factory reset eliminates software doubts. If the light still fails on a clean system, it’s time to contact the manufacturer or a reputable repair shop for hardware diagnostics.
Before you reset, run our torch test one last time with steady and strobe patterns. A failure under these conditions strengthens the case for repair.
Important steps to back up data before performing a factory reset.
Back up your data first; once erased, it’s gone. Here’s a quick checklist:
- Google backup: Settings > Google > Backup (or Settings > System > Backup). Ensure App data, Call history, Contacts, and SMS are backed up.
- Photos and videos: Open Google Photos and confirm backup is complete, or copy them to a computer or external drive.
- Chats: Use each app’s built-in backup (cloud or local export) and verify success.
- Two-factor (2FA): Transfer or back up codes where supported, or keep recovery methods handy.
- Accounts and passwords: Confirm you know your Google account password for reactivation.
When ready, go to Settings > System > Reset options > Erase all data (factory reset). Plug in your device and allow the process time. After setup, test the Flashlight tile before restoring apps to get a clean read on the hardware.
8. Alternative Solutions and Apps
Explore third-party flashlight apps that can be used as alternatives.
If the system tile remains unreliable but the LED works inside the Camera app, a lightweight torch app can be a temporary solution. Look for flashlight apps that are ad-free, request minimal permissions (Camera only), and have a privacy policy you can accept. Some apps add useful features like persistent notification toggles, quick widgets, or “shake to light” gestures for one-handed use.
Security tip: avoid apps that demand unnecessary access (location, contacts, microphone). A flashlight shouldn’t need them. Test any new app right after installation, and keep only one third-party torch app at a time to reduce conflicts.
Discuss potential benefits and drawbacks of using alternative apps.
Benefits include convenience and features: faster access, lock-screen buttons, and brightness presets on compatible devices. Drawbacks consist of ads, potential battery drain if the app keeps background services alive, and a greater risk of conflicts with the camera service. If your core issue lies at the OS level, alternative apps won’t fully resolve it and may even worsen the problem.
If you want a quick diagnostic without installing anything, try a browser-based flashlight test online using our built-in tool. It pulses the LED through several patterns, helping identify whether brightness dips, timeouts, or thermal limits are the real issue.
9. Preventive Measures for Future Issues
Tips for maintaining your Android device to avoid flashlight problems.
Good habits prevent many torch troubles. Treat this as routine Android device maintenance to minimize surprises:
- Keep the flash window clean and unobstructed. Align case cutouts carefully, and avoid stickers near the LED.
- Avoid prolonged torch use in hot environments; allow your phone to cool down.
- Do not let the battery run low before relying on the torch; low power can disable the LED.
- Limit drops and moisture exposure—LED modules are sturdy, but solder joints and lenses aren’t invincible.
- Maintain storage headroom (10–20% free) so the camera stack and system UI have room to operate.
If you use automation to toggle the torch (gestures, routines), keep those rules simple and well-tested to avoid locking the camera resource.
Regular software updates and app management best practices.
Keep your OS and camera components up to date, then review app permissions quarterly. If an app no longer needs camera access, revoke it. This reduces conflicts and keeps the torch free for system use.
Set a recurring reminder to:
- Install system and security updates, then reboot.
- Audit Camera permission usage and remove excess grants.
- Prune duplicate scanner or camera apps—choose one you trust.
- Open the Camera app weekly to refresh cached modules and permissions.
- Check your flashlight settings in Quick Settings; keep the tile visible and test it briefly.
Should you notice odd behavior—torch lag, light cutting out, or unexpected blinking—run a quick test with our torch tool and the Camera app back-to-back. Early detection is the best prevention you can implement.
Wrap-up: Test, Isolate, Fix—Then Keep It That Way
A stubborn torch usually traces back to one of three issues: a camera service conflict, a protective limit (battery or heat), or a physical problem with the LED assembly. You now have a full workflow—from quick tile checks to Safe Mode, resetting app preferences to the nuclear option of a factory reset—to separate those threads and act with confidence. When you need certainty fast, our built-in torch tester offers a clean, no-install way to confirm behavior and guide your next step.
If your flashlight won’t turn on right now, start with the quick checks in Section 2, then continue down the list until it works. Run a brief test after each change, take notes, and stop when it’s functioning. Ready to begin? Open Quick Settings and try the tile, then run our torch test to verify a steady beam. If hardware seems at fault, schedule a repair before the issue worsens.
Frequently Asked Questions
Why is my flashlight not working on my Android device?
There could be several reasons your flashlight isn’t working, including software glitches, low battery, or hardware issues. Start by restarting your device and checking if there are any software updates available.
How can I fix the flashlight feature on my Android phone?
To fix the flashlight feature, try turning it off and on again in the quick settings menu. If that doesn’t work, clear the cache of the Camera app, as the flashlight function is often linked to it.
What should I do if my flashlight still doesn’t work after troubleshooting?
If your flashlight still doesn’t work, consider performing a factory reset as a last resort, or consult a professional technician to check for potential hardware issues.